

How To Add Feathering In Photoshop
Many times photos or drawings require a softening effect around their edges and in Photoshop, this is known as "Feathering." It's a somewhat uncomplicated procedure that proves useful for blending images, softening edges, or creating localized adjustments to your images.
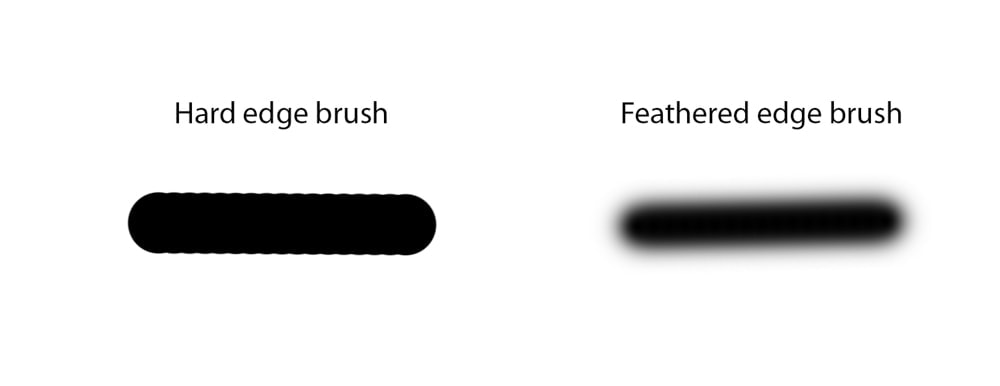
Feathering in Photoshop is used to soften the border of an image, brush, or layer. For example, a brush stroke with a high plumage volition have blurred edges that blend into the epitome. In contrast, a brush stroke with a low plume will have a hard edge and prove more useful when painting near objects.
Now throughout this tutorial, you lot'll learn the different ways feathering changes your images, as well as how to use it to soften the edges of your photos to make them stand out.
What Is "Feather" In Photoshop?
Feather in Photoshop refers to soft edges. You can utilise these soft edges around a choice to nicely blend images, practice abroad with difficult edges, or add localized adjustments to object within an image. It can too be used to fade parts of an image, blend castor adjustments, and brand cutouts look more than realistic.
The feather setting in Photoshop can be achieved using the brush tool or selections. Selections are more commonly used because they tin cover a large area to utilise the effect at once. In contrast, a feathered brush is used for more than specific adjustments, such as feathering a pocket-sized area in an image or achieving a softening effect on a particular part of an image.
Hither's what a hard edge castor looks like vs. a feathered edge brush:
How To Accommodate Brush Feathering
To arrange the Brush Tools plume in Photoshop, select the Castor Tool, then right-click on your sheet to open up the Brush Preset panel. Here you will see a Hardness slider that controls the amount of feather your brush has. Set the hardness to 0% for a soft-edged castor or 100% for a hard-edged castor.
Allow's break this down step past step.
Hither's how to adapt a brush's hardness to attain a feathered wait:
- Create a new layer past clicking on the new layer icon in the layer panel (it's the foursquare with the cross in information technology). Yous can likewise use the shortcut Shift + Control + N on Windows or Shift + Command + N on Mac to create a new layer.

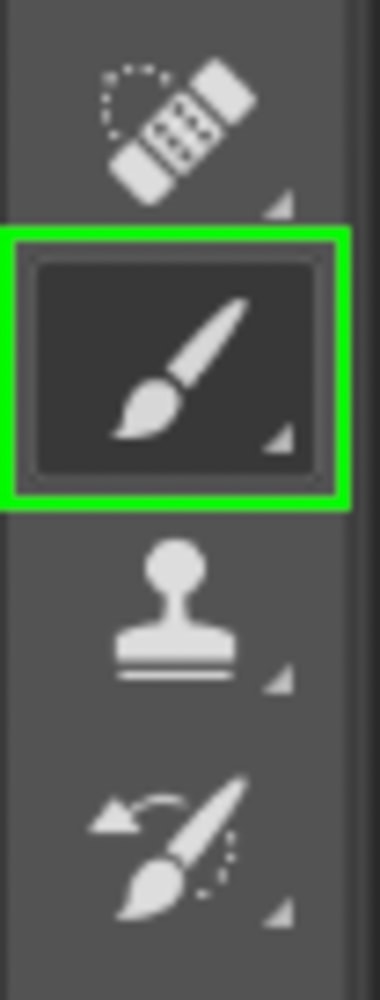
- Next, select the brush tool, it'south the paintbrush icon in the toolbar to the left of the screen. You can likewise use shortcut B to quickly select the castor tool also.
- Once you've selected the brush tool, go to the Setting Bar and at that place will be a circle adjacent to the brush tool icon. Click it and a popup carte will appear with the brush's settings.

- In the castor'southward settings, you'll meet ii sliders, ane determines the castor'southward size and the other determines the brush'south hardness. For this tutorial, a 100 px castor was used, just yous tin apply whatever size is most comfy for y'all. The hardness is set at 100% as default.
This level of hardness provides the sharp edges you usually encounter in most images, but the feathering effect softens those edges. To add a plumage to your brush, bring downwardly the hardness corporeality.

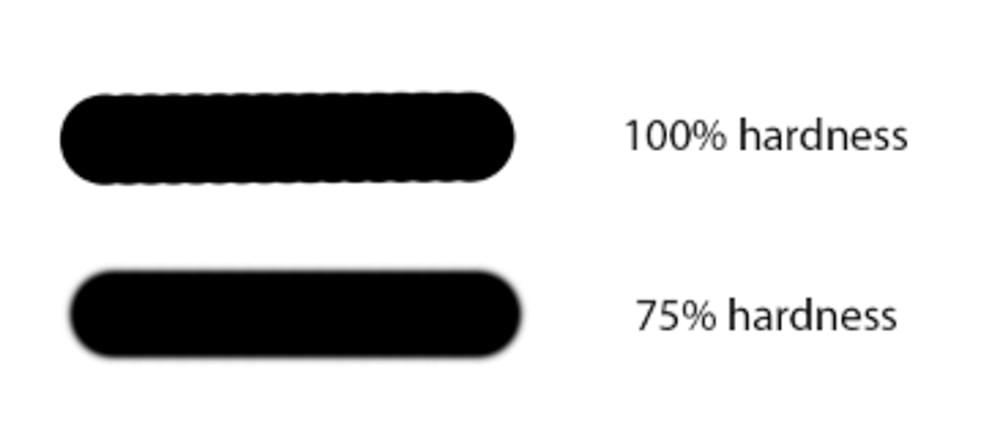
- Since you have your new layer ready, pigment a brush stroke with your castor at 100% hardness. It will wait something like this:

- Next, you're going to lower the castor's hardness past 25% and paint a stroke beneath the first one. Notice how the edges are not as hard on the 2nd stroke as they are on the starting time stroke? That'south because the hardness has been reduced, even though it's only by 25%.
- At present, reduce the brush's hardness past increments of 25% and make a stroke until you reach 0% hardness. And so compare each stroke and encounter how the edges gradually get softer, giving the brushstroke that feathering consequence.

Every bit you tin see, as the brush's hardness goes downward, the feathering effect increases. But, of class, the feathering you'd demand for your images would depend heavily on you and your project, so don't be agape to experiment and see what works all-time.
How To Plumage The Edges Of An Image Or Layer In Photoshop
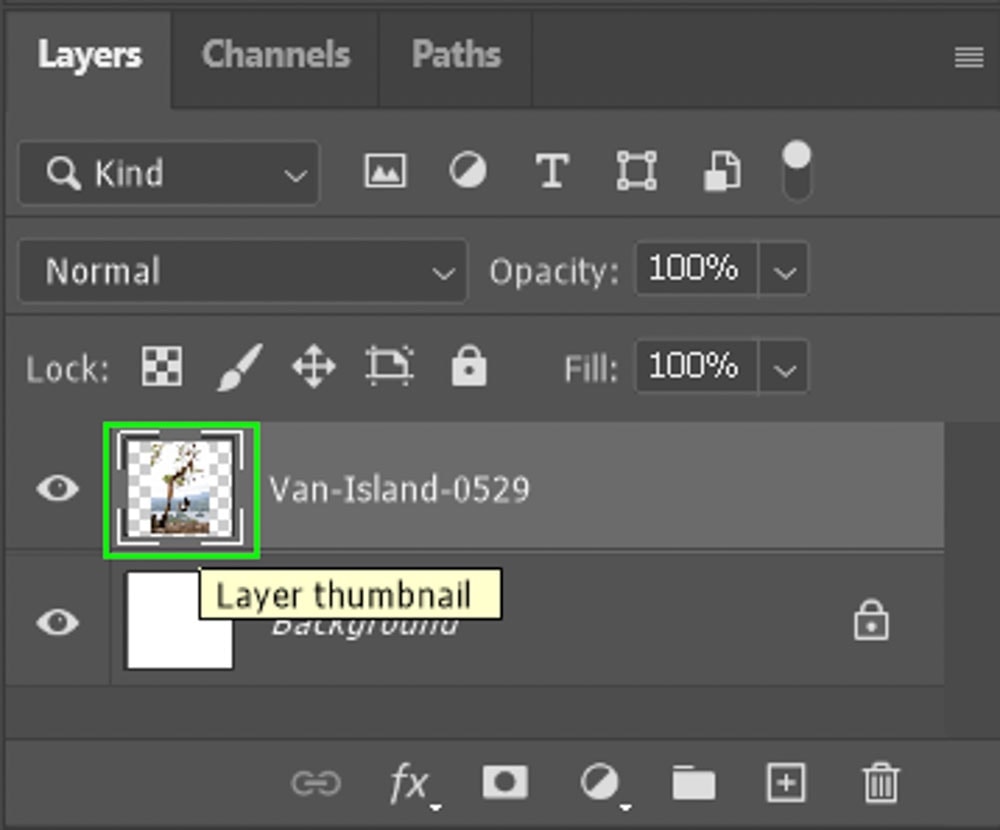
To feather the edges of a layer in Photoshop, select the layer past holding Control or Control and clicking on the layer thumbnail. Next, become to Select > Change > Feather and set the desired plume amount. Now add a layer mask to your image layer to feather the edges of the image.
To requite you a more detailed idea of this process, let's break information technology downward further:
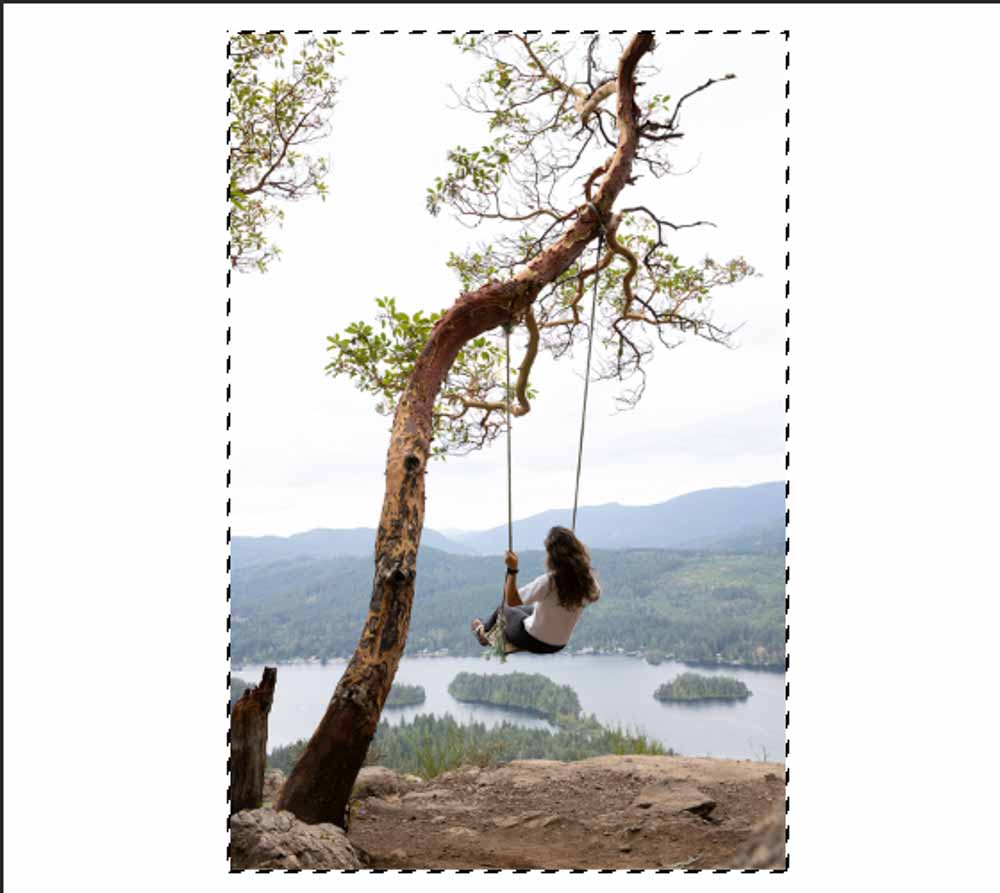
- Create a new file in Photoshop by pressing Control + N on Windows or Command + N on Mac, and so import the image y'all want to give the feathering effect. Once you've imported the epitome, press Control + T on Windows or Command + T on Mac to actuate the costless transform tool. Then adjust the image size and position so that it is centered on your sail.


- Now that you're all ready, press Control on Windows or Control on Mac and and then click the thumbnail of the prototype layer. This volition select the image, and you can tell it's selected when it has the cleaved lines surrounding it, besides known every bit marching ants.
- Later on selecting the prototype, become to the Menu Bar and click Select. From the dropdown menu, hover your cursor over Modify and click Feather from the carte du jour that appears to the right. If you wish to forgo all of this, yous can as well utilize the shortcut Shift + F6 to open the Feather Choice Window.


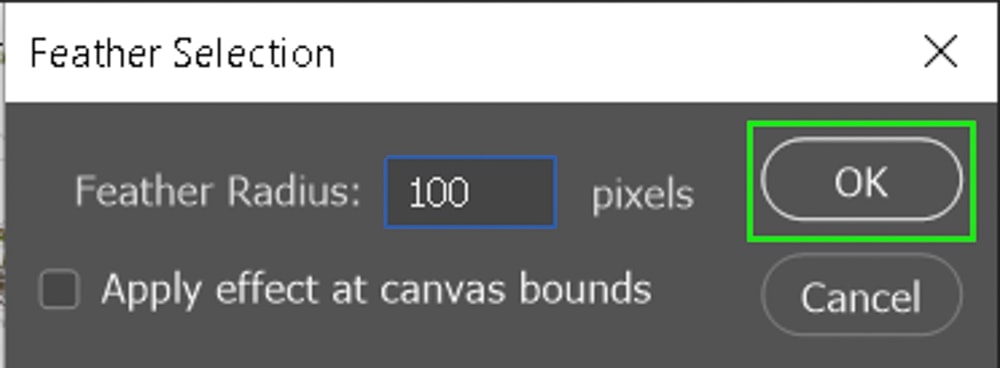
- Adjacent, y'all'll see the Plume Selection popular up. The Plumage Radius is how much feathering will exist applied to your image. For this tutorial, a feather radius of 100 pixels was used. Yous can tweak it however you lot wish for your future projects only for this example, I'll set it to 100 pixels then click OK.
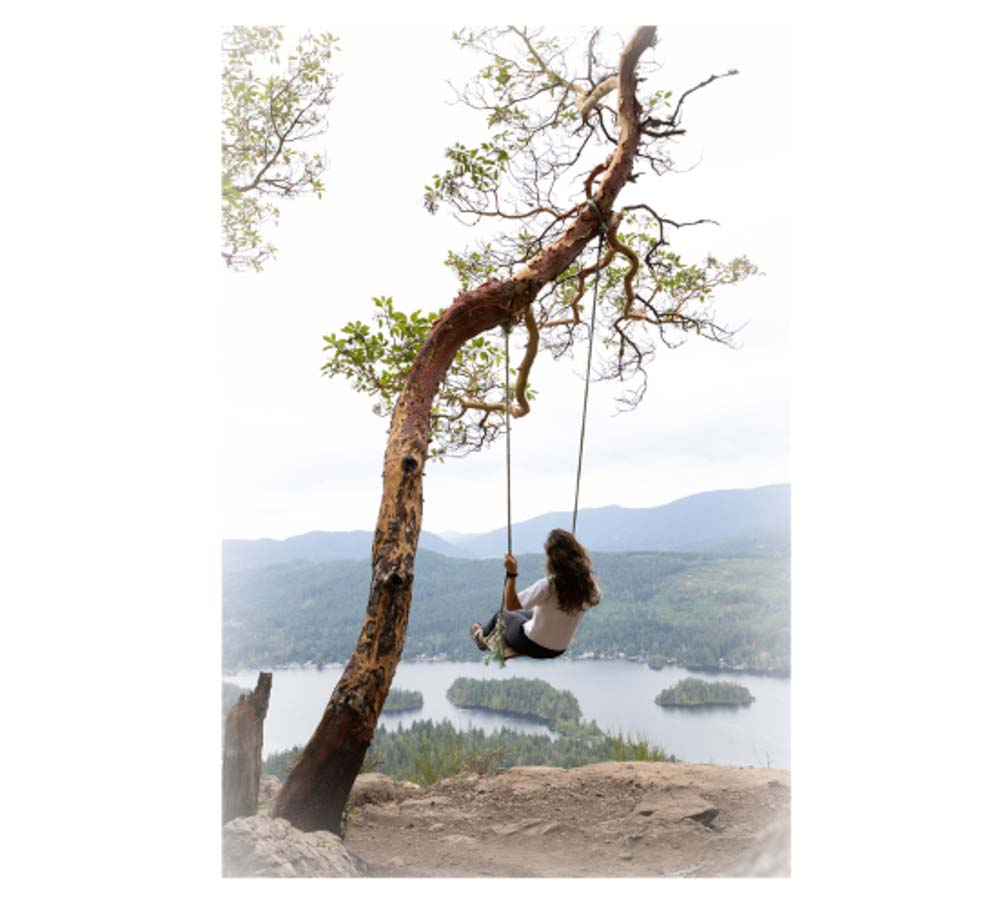
- When you're finished applying your Feather Selection, you'll notice that the pick around your image has changed. Information technology's no longer a rectangle with sharp corners, but now i with rounded corners. This is considering the selection has adapted inward to friction match the feather.

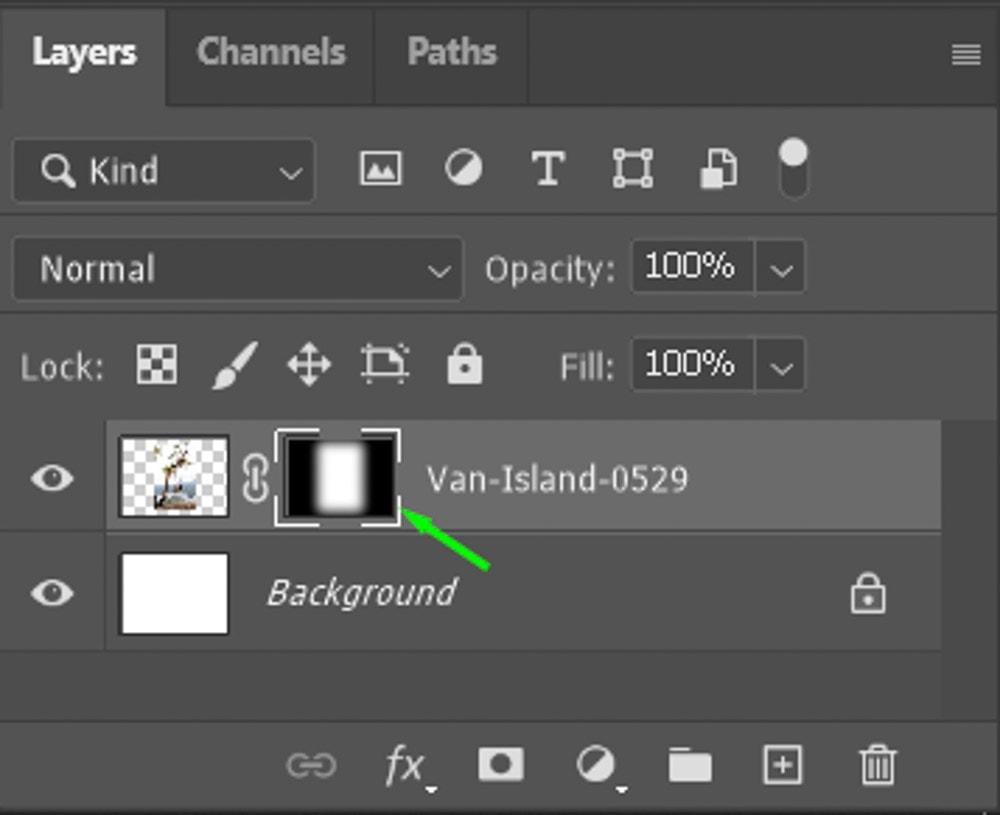
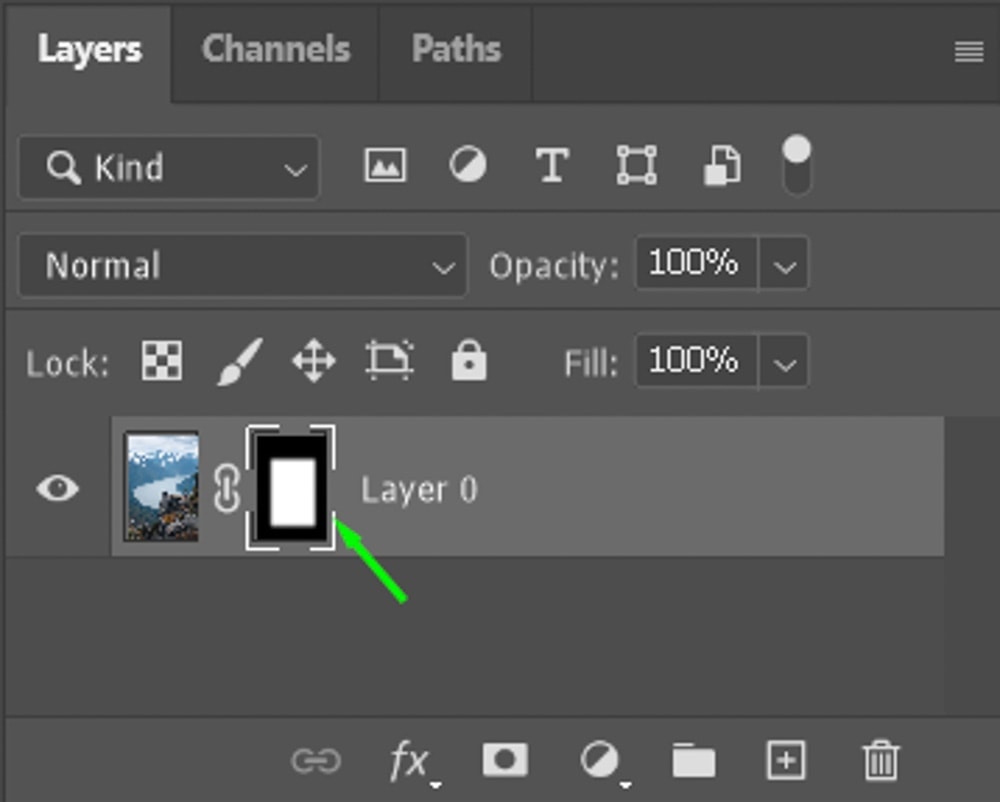
- With your paradigm still selected, become back to the layer panel and click the layer mask icon to successfully apply the feathering effect to the edge of the prototype.

How To Add together Feather To Marquee Selections
Applying the feathering result is possible not only through using the feather office mentioned in the method in a higher place. Yous tin likewise add plume to marquee selections as well.
- First, select the rectangular marquee tool from the Toolbar. You lot can also utilize the shortcut G to actuate it every bit well.

- Next, go to the upper Setting Bar, where yous will run across a Feather section. Its default will be 0 px, but I'll adjust the feather to 100 px. This will utilise the plume issue to your choice when information technology is drawn with the marquee tool. As ever, the 100 px is just a value used for sit-in, you tin can adjust as yous see fit.


- In one case you've adjusted the marquee tool's feather, draw a selection on your prototype. Every bit you tin see, even though y'all're using the rectangular marquee tool, information technology will suit inwards to the feather value applied in the previous stride.

- After drawing your selection on your epitome. Go to the Layers panel and click the layer mask icon at the bottom of the panel to utilize a layer mask and reveal your plume effect.


There you accept it; you now know well-nigh feathering Photoshop and how to use it. As you lot've seen, feathering is a great style to get rid of crude edges or make parts of a photo stand up out on their own.
Happy feathering!
Source: https://www.bwillcreative.com/what-is-feathering-in-photoshop-and-how-to-use-it/#:~:text=To%20feather%20the%20edges%20of%20a%20layer%20in%20Photoshop%2C%20select,the%20edges%20of%20the%20image.
Posted by: jacobsslions.blogspot.com
0 Response to "How To Add Feathering In Photoshop"
Post a Comment